- 02 Jul 2021
- Linksys
- Linksys Extender Setup Troubleshooting
- Comments: 0
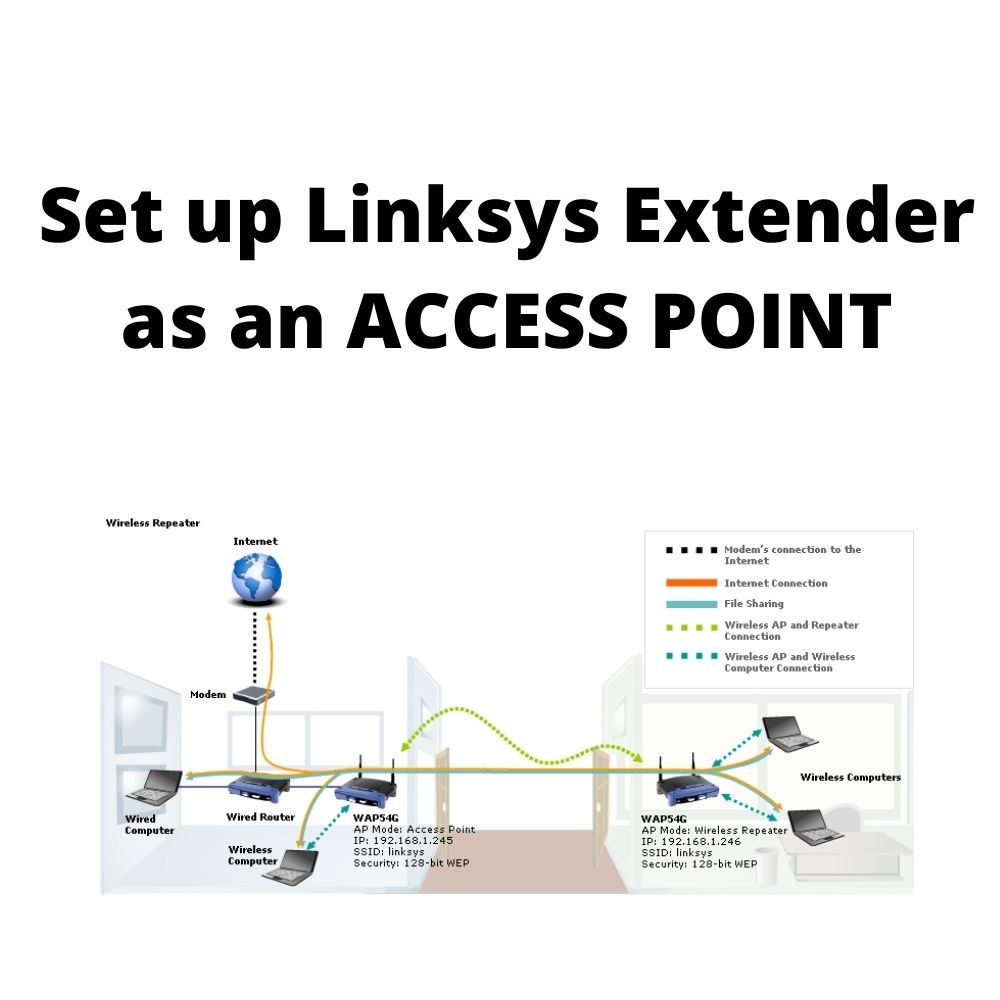
Today in this article we will learn a simple method for setting up Extender as Linksys access point and will answer the question “How to Setup the Linksys Extender as Access Point“.
Firstly, for the people who are not familiar with what Access Point is, a quick intro-
Access Point is a way of setting up your Access point or router. Which means we can set up multiple Range Extenders on this one or can connect multiple devices to this unit.
Linksys access point steps
1) Firstly, ensure that on the Range Extender, the slider button is not on the side marked as
EXTENDER and towards the side marked as the ACCESS POINT.
2) For example, to set it up as an ACCESS POINT it is mandatory to be towards the access points side.
3) Now hard wire your Linksys Range Extender directly to your router’s LAN port.
4) Here in this step, you will just have to login into your extender’s default setup page.

Moreover, you can do that by directly typing the “default IP address” of your Linksys Extender into the Address bar of your browser from your PC and laptop or cell phone, etc.
6) Once you are in the smart setup wizard, It will ask for your permission, “How you want to Setup this extender” “as a range extender” or as an “Access point“.
7) Hit on Access Point option.
8) It will ask you to punch-in your Main Router’s password. Once you type that hit NEXT.
9) It takes hardly 60 seconds after that it will secure connection with your router. You will see solid green light on the Extender.
10) Lastly, Your Linksys Range Extender is Setup.
Related Posts
Why is my Linksys RE6500 WiFi Range Extender disconnecting so frequently?
12 Jan 2022 0How Do You Setup Linksys RE1000 Wireless Range Extender?
12 Jan 2022 0Is Your Linksys Extender Failing to Broadcast SSID?
11 Jan 2022 0